Gruul's Lair is a high-level raid in Burning Crusade Classic. Deployed as part of Phase 1, it is one of the first 25-player raids available to Level 70 players.
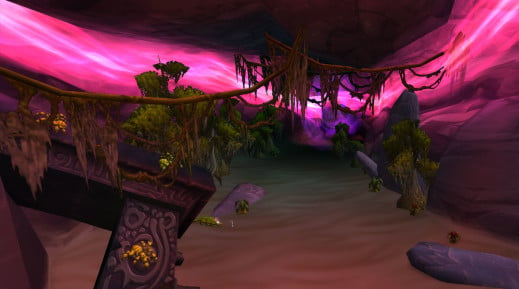
Gruul's Lair: Entrance
The entrance to the raid is located north of the Blade's Edge Mountains, in Outland.
- Coordinates: 68,24

Related Quests
High King Maulgar: Strategy
The fight against High King Maulgar and his council is typically like most bosses of the "Council" type: an unprecedented mishmash where each player has a very specific role that they must perform to the letter.
Five bosses make up this council of ogres:
- High King Maulgar: Warrior
- Kiggler the Crazed: Shaman
- Blindeye the Seer: Priest
- Olm the Summoner: Warlock
- Krosh Firehand: Mage

The health of each of the bosses is unrelated, so the order in which you should kill them is:
- Blindeye the Seer
- Olm the Summoner
- Krosh Firehand
- Kiggler the Crazed
- High King Maulgar
The battle has two phases, the second starting when High King Maulgar passes the 50% health mark. The death of one of the council members does not affect the behavior of the others (i.e. bonus damage or health regen).

Blindeye the Seer
Skills
- Heal
- Greater Power Word: Shield
- Prayer of Healing
Blindeye the Seer is the primary target of all group DPS. He must be placed near Olm the Summoner in order to favor the cleave on him and gain some time over the total duration of the encounter.
Blindeye is only really dangerous because of his Prayer of Healing and his Greater Power Word: Shield.
Periodically, he self-casts Greater Word of Power: Shield which absorbs all damage taken and makes him immune to the effects of interruption or stun. A Prayer of Healing usually follows which, if the shield is not destroyed before the end of the cast, heals the rest of the council for a great deal.
The objective is therefore rather simple: interrupt the healing spells as much as possible, destroy the Greater Power Word: Shield as soon as it is active, and execute this Priest as quickly as possible!
Tips
- Greater Power Word: Shield can be dispelled by Mass Dispel and Dispel Magic from the Priest, as well as from the Shaman's Purge and the Hunter's Arcane Shot.
- Priest's Silence interrupts Blindeye's casts even when the shield is active
- Hunter's Silencing Shot interrupts Blindeye's casts even when the shield is active
- The Improved Kick (Rogue), Improved Shield Bash (Warrior), and Improved Counterspell (Mage) talents interrupt Blindeye's casts even when the shield is active
- Blindeye can be stunned by most abilities that apply this type of effect while the shield is not active
- Blindeye can be interrupted by most abilities that apply this type of effect while the shield is not active
Olm the Summoner
Skills
- Dark Decay
- Summon Wild Felhunter
Olm the Summoner is no problem at all if you have two Warlocks. This ogre is accompanied by a corrupted Felhunter, so the role of your Warlocks is to use their Enslave Demon on them. When a corrupted Felhunter dies, another quickly takes its place, meaning Warlocks must be quick to react.
Positioning is rather simple: glued to Blindeye the Seer. A Tank must make sure to apply threat to this boss in case the Felhunters die unexpectedly.
Krosh Firehand
Skills
- Spell Shield
- Greater Fireball
- Blast Wave
Krosh is arguably one of the most dangerous ogres on this council, due to the Blast Wave he periodically launches 15 yards around him, dealing colossal damage to all players hit. For this simple and unique reason, he must be placed away from the other ogres and tanked by a Mage.
Why a Mage? Because the only real technique Krosh possesses, apart from his Blast Wave, it is his Greater Fireball, which he throws in a loop. To counter this, the Mage has at its disposal Fire Ward and Spellsteal, which it can use on Krosh as soon as he places his Spell Shield. In doing so, the Mage tank will reduce Krosh's magic damage by 75% for 30 seconds -- every 30 seconds. Easy, right?
Important: Only the Caster DPS should focus their attacks on Krosh when Olm dies. Melee players must aim directly at High King Maulgar, otherwise they will suffer Blast Wave and die. The same goes for pets, especially those of Hunters.
Kiggler the Crazed
Skills
- Lightning Bolt
- Arcane Explosion
- Arcane Shock
- Greater Polymorph
Ideally, Kiggler should be tanked by a Balance Druid, as he periodically casts Greater Polymorph on the current tank, preventing them from acting for 10 seconds, and removes any threat he has generated. Thanks to his Moonkin Form, the Balance Druid is immune to polymorph effects, making him the ideal "dummy tank" for this boss -- provided he is positioned far enough from the boss to avoid his Arcane Shock.
In the event that your group does not have a Balance Druid, know that on the one hand that it is scandalous, but on the other hand that two ranged DPS can also do the trick. The idea is that one takes the aggro while the other is under the effect of Greater Polymorph. This strategy will require the DPS to be extra careful about the threat they generate, but with a little restraint it does the trick!
Apart from Greater Polymorph, Kiggler is very similar to Krosh in that he has three techniques: Lightning Bolt, which he throws in a loop on the current tank, Arcane Explosion, which he periodically launches and pushes back the targets hit 30 meters, and Arcane Shock, that he casts periodically on the current tank and which interrupts his current cast for 5 seconds.
Important: Only the Caster DPS should focus their attacks on Krosh when Olm dies. Melee players must focus directly on High King Maulgar, or they'll suffer Arcane Shock and die.
High King Maulgar
Skills
- Mighty Blow
- Arcing Smash
- Intimidating Roar
- Whirlwind
Until he reaches 50% of his maximum health, High King Maulgar is nothing more than a sack of health dealing colossal damage. He should be placed away from the other ogres while they are still alive, and melee players should be careful as every 60 seconds or so he launches a Whirlwind for 15 seconds that deals heavy damage to all nearby players.
After passing the 50% health mark, Maulgar throws his hammer to the ground, which greatly reduces the melee damage he inflicts. However, he now begins to use Intimidating Roar every 15 seconds and randomly charges remote targets. The Intimidating Roar forces Maulgar to change targets and attack the second tank (or at least the target with the most threat following the Roar).
Even if he no longer has his hammer, Maulgar continues to throw Whirlwinds every 30 seconds or so during Phase 2, until his death. Melee players should continue to be very wary of this technique. As for ranged players (Healers included), they must ensure that they are well dispersed throughout the room at all times, from Phase 1 until the end of the fight.
Notable Loot
|
Location |
Object |
Type |
|---|---|---|
|
Shoulder |
 Pauldrons of the Fallen Defender |
Warrior Druid |
|
Shoulder |
 Pauldrons of the Fallen Hero |
Hunter Mage Warlock |
|
Shoulder |
 Pauldrons of the Fallen Champion |
Paladin Rogue Shaman |
|
Weapon |
 Hammer of the Naaru |
Mace |
|
Head |
 Malefic Mask of the Shadows |
Leather |
|
Wrist |
 Bladespire Warbands |
Plate |
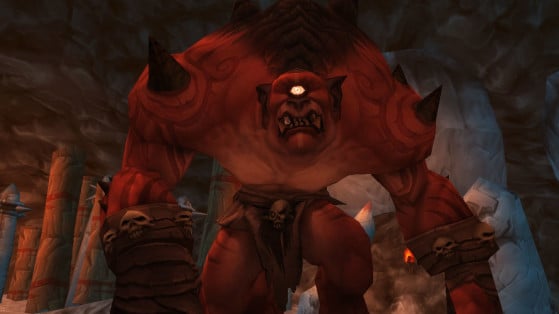
Gruul the Dragonkiller: Strategy
Skills
- Growth
- Cave In
- Shatter
- Ground Slam
- Hurtful Strike
- Reverberation

The fight against Gruul the Dragonkiller is as simple as it is nerve-racking, since it is a Patchwerk-type fight. He has very few abilities, but the damage he inflicts increases as time passes. Basically, if you don't kill him quickly, your party will wipe.
This fight takes place in a single phase, but every 30 seconds, Gruul gains Growth. This increases the damage he inflicts by 15% until... his death. This bonus applies to all of his abilities, but also to his auto-attacks, making him especially dangerous for tanks.

-- The two tanks must be glued to each other at all times, since Gruul launches a Hurtful Strike every 20 seconds that deals damage to the melee target closest to its primary target and with the most threat to the boss. If it is a melee DPS that is second in the threat table, it dies. If it is a caster DPS who is second in the threat table, then Gruul casts his Hurtful Strike on the next available melee target (i.e. in range).
-- Periodically all players are affected by Reverberation, which silences all players for 4 seconds. Just make sure the tanks' health (mostly) is high enough to survive for those few seconds.
-- Avoid Cave In on the ground, as it inflicts fairly minimal damage at the start of the encounter but becomes dangerous over time.
-- Move away as possible from each other when you reach 5 stacks of Ground Slam, as Gruul launches Shatter on all players. Damage depends on the distance you are from another player who has been turned to stone (20m maximum).

-- Periodically all players are affected by Reverberation, which silences all players for 4 seconds. Just make sure you keep the tanks' health high enough beforehand to survive for those few seconds.
-- Avoid Cave In on the ground, as it inflicts fairly minimal damage at the start of the encounter but becomes dangerous over time.
-- Move away as possible from each other when you reach 5 stacks of Ground Slam, as Gruul launches Shatter on all players. Damage depends on the distance you are from another player who has been turned to stone (20m maximum).

-- Always ensure your threat level is below that of the two tanks, otherwise you will suffer the Hurtful Strike (and die).
-- Avoid Cave In on the ground, as it inflicts fairly minimal damage at the start of the encounter but becomes dangerous over time.
-- Move away as possible from each other when you reach 5 stacks of Ground Slam, as Gruul launches Shatter on all players. Damage depends on the distance you are from another player who has been turned to stone (20m maximum).
Tips
- Ground Slam charges can be negated in a number of ways: using a Druid Form, Ice Block (Mage), Cloak of Shadows (Rogue), Divine Shield (Paladin), Blessing of Freedom (Paladin) , Blessing of Protection (Paladin), Escape Artist (Gnome), and many more. Abuse them!
- If you reach 5 stacks of Ground Slam, you will not be able to escape the damage inflicted by Shatter even if you are under the effects of an impairment-removing technique (e.g. Ice Block).
Notable Loot
|
Location |
Object |
Type |
|---|---|---|
|
Legs |
 Leggings of the Fallen Defender |
Warrior Druid |
|
Legs |
 Leggings of the Fallen Hero |
Hunter Mage Warlock |
|
Legs |
 Leggings of the Fallen Champion |
Paladin Rogue Shaman |
|
Main Hand |
 Bloodmaw Magus-Blade |
1H Sword |
|
Off Hand |
 Aldori Legacy Defender |
Shield |
|
Neck |
 Teeth of Gruul |
- |
|
Waist |
 Gronn-Stitched Girdle |
Leather |
|
Feet |
 Windshear Boots |
|
|
Trinket |
 Dragonspine Trophy |
- |