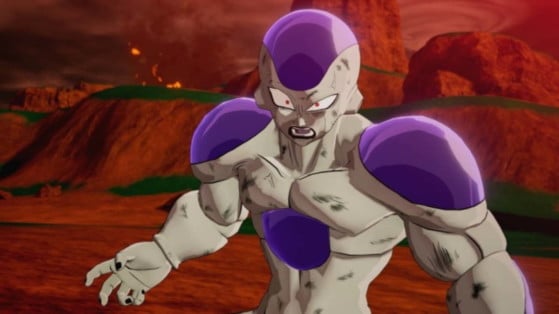
We hope you've managed to wrap up all the sub stories in this Dragon Ball Z Kakarot saga, as it's now time to tackle the battle against the merciless Freezer. A rather tough duel, although a bit at the boss' disadvantage: cut in 3 battles, your SSJ1 Son Goku should do the trick. In this guide we'll take a look at his attacks in the last fight, how to dodge them, and how to retaliate properly.
How to defeat Frieza
Frieza has a large amount of special attacks and he won't hesitate to mix them up to try and knock some HP out of you. The fight is a bit disappointing and lacks challenge, especially for those who have had the good idea to experiment a bit or increase their stats through cooking or community boards.

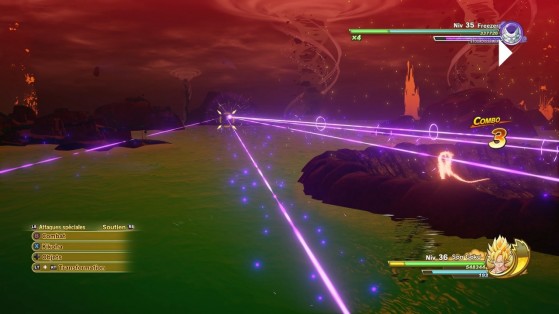
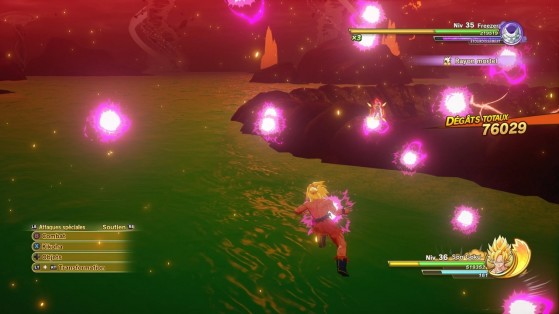
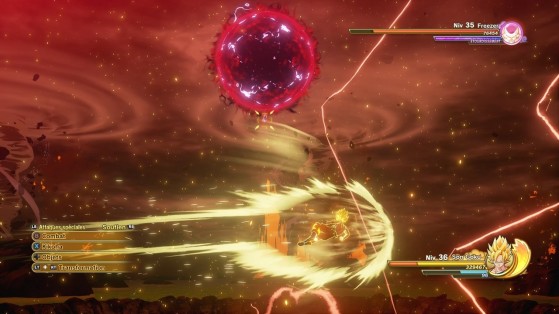
The death ray attack forms several parallel red lines, very easy to dodge, but Frieza will not hesitate to mix it with other special attacks like his very powerful death ball. Its most annoying technique remains its rain of energy balls that will inexorably end up touching you: watch their movement carefully and wait for them to mass on you to trigger a side dodge. Finally, his kikoha discs do quite a bit of damage and Frieza will throw 3 of them at you in a row, but as usual, you just have to turn around the boss at full speed while being at a good distance to dodge everything.
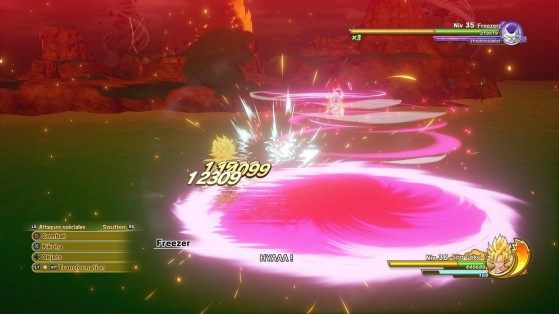
As in the fight against Vegeta, you'll be able to deflect his most powerful attack by nibbling a yellow bar that will appear while it's charging. A follow-up will be proposed to you right after, so think about doing B/round at the right time. This will happen twice, after which Frieza will throw his death ball much faster.
As soon as you see the name displayed, you must put yourself at a distance, then turn around the boss to avoid it. If you're on one of the edges of the energy ball, you can attempt a perfect dodge to the side, but it's at your own risk.
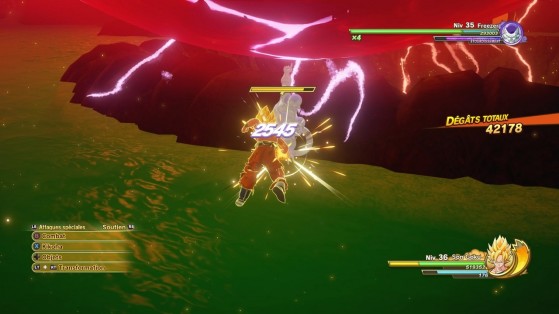

Its main opening is just after its deadly rain of blows: he will need to recover, so take advantage of it. Load your ki to the max and click your left stick to charge him. Depending on your level, you should be able to snatch a whole life bar from Frieza with a basic combo followed by your finest kamehameha.