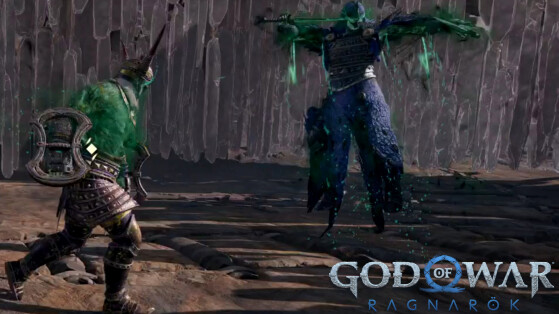
Bodvar the Fierce and Starolfr the Bothersome make a nice couple, which will probably make you rage, both in God of War Ragnarok, and in real life, especially on high difficulty. It must be said that the game does not lend itself too much to clashes against several bosses at the same time.
The objective of this guide, as well as all those dedicated to bosses, is to help you beat them on maximum difficulty, "Only God of War", so that they are relevant for all levels. Unfortunately, unlike our other guides, this one does not include a video, due to a recording problem.

The 12 Berserkers and their king
Normally, at this point, you should know how this quest works. Once the 12th berserker is dead, you can return to where you found the sword hilt, at the Tomb of the King, in Midgard, to face what could be considered one of the game's two ultimate bosses.
Be aware, however, that you cannot kill the 12 berserkers before completing the main story, since the last one is in an inaccessible area before the "post game" content, after the death of the final boss. Check out our 12th Berserker guide for more info on his location.
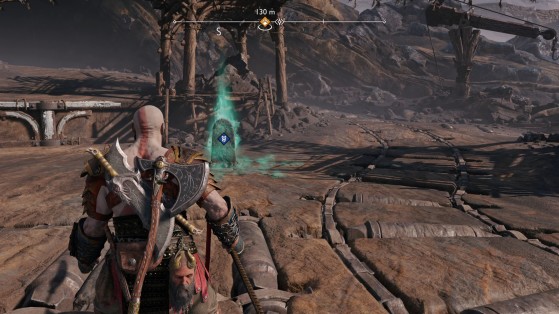
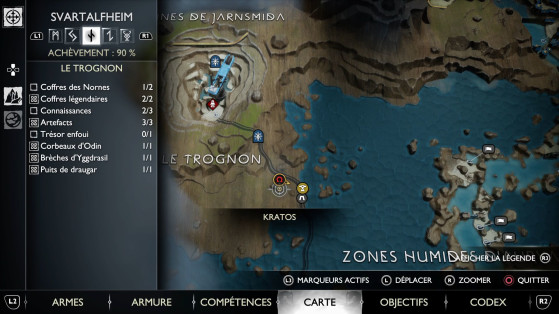
This couple can be found at the entrance to the Jarnsmida Mines in the southwest section of Svartalfheim. Contrary to what some may think, it is possible to return to the area before the end of the game. To do this, you must take the barge used during the escape from the mine with Tyr in the opposite direction. You can then go all over the Trognon in the opposite direction, as long as you have unlocked the Draupnir Spear. It will also allow you to unlock 2 new mystical portals, which will make traveling a little less painful next time.
What equipment to use?
These two bosses are level 6, if you play on a high difficulty level, you need at least the same level of equipment. If the enemy's life bar is red, with a skull and crossbones, victory is almost impossible. Given the structure of the fight, we advise you to save these berserkers for the end, and to go and do them at level 7 or 8+ , especially if you play in a high difficulty mode.
Certain armors have the opportunity to shine in this fight, we especially think of the Radiant Bracelets and the Radiant Belt , since their slowdown bubble in the event of a dodge in extremis, will save your life by controlling the bosses a little, then you will have the opportunity to counter-attack more easily.
The Spartan Rage - Fury is particularly effective in this fight, since it allows you to attack the 2 bosses at the same time if you use it well, while protecting you from attacks that you do not see coming.
Don't forget your Berserker Resurrection Stone, it can give you the boost you're missing at the end of the fight.
We advise you to use the Emblem of dodge in Enchantment in your Amulet of Yggdrasil: The extension of range and speed of rolls will save your life many times.

Strategy
Individually, these two bosses aren't too much of a pain, though they're not kidding either. They carry over most of the attacks from previous berserkers, with some blending in to spice things up. They are not to be underestimated, but the real difficulty obviously comes from the fact that they are two at the same time. Your victory will depend on your ability to manage this duality.
The developers obviously realized that having two berserkers in melee at the same time was unplayable. This means that most of the time, one of the berserkers will automatically target your companion (Atreus or Freya, depending on when you face them). Which leaves you with only one enemy to deal with. Of course, it would be too easy to just focus on one target until it dies. Berserkers will often reverse their targets. Your target will then step back, or even teleport, by pronouncing a characteristic sentence which is addressed to their spouse such as:
When Starolfr was your target, she will eventually say: "Yes! Aspire to glory, my love!" indicating that Bodvar the Fierce is going to target you.
This target shift is going to happen regularly, and it's important for several reasons:
- It keeps you from focusing on a single target, you can't take out a Berserker quickly. If you approach a berserker that isn't targeting you, you risk having both on your back at the same time, which is absolutely deadly. This also means that you have to try to stay away from the second berserker during the fight, in order to avoid unexpected and unwanted target changes.
- This means above all that the second following this sentence, we must expect an attack from the other berserker, typically, it is a red charge or a spell. If you haven't changed your target in time, you risk death. If you don't have the other berserker in sight, because he's behind you, now's the time to roll in a hurry.
- If you don't immediately melee Bodvar when he targets you, he may use his mega blast (blue circle) which will inflict extreme damage on you. This is by far the main source of deaths in this fight.

It will therefore be necessary to show method and patience during this fight. Try to always have the two berserkers in your line of sight (if possible), even if it means not using target lock. And above all, do not approach them one from the other, in order to prevent the second berserker from deciding to target you by surprise behind your back, which would have disastrous consequences. Target changes happen regularly, allowing you to prepare for them by turning the camera, preparing to dodge, and reacting to the specific abilities of your new target, or rather, the new berserker that is about to target you.
Note : If you attack a berserker too aggressively during the time the warning phrase should have been uttered, it seems to go ahead anyway, putting you in a lethal type 2 vs. 1. So don't be too aggressive, reposition yourself after a sequence, to assess the situation and react to threats.

Bodvar
He's the wizard of the couple, and you should know more or less the majority of his abilities if you've done other berserkers like the dreaded Beigard (see below). As usual, some abilities are more painful than others, notably the 4 projectiles launched from a high position, which must be dodged at the last moment, or the teleportation followed by an explosion, which must be dodged or parry.
What makes Bodvar really annoying is his mega burst of masses (blue circle) to be broken with a shield hit (L1 x2) . The damage is extreme, and its range has no limits. The only solution is to interrupt it. So always try to stay close to Bodvar when he takes aim. You also have to be prepared to rush at him when there is a change of target. Fortunately, he can't use this ability when facing your teammate, but if you pass too close, or if he changes his target, he can start there. Manage the target switch well and this technique is your number 1 priority.

Starolf
Madame is the melee combat specialist. Her attacks should be relatively familiar to you, since they resemble those of other berserkers of the genre, including the zealous Fraekni. What makes her dangerous is that she has 2 ranged red attacks, her charge and her combat jump, which she launches on almost every hit, the instant after a target change. As soon as Bodvar lets go of his sentence, prepare to be charged by Starolf.
Apart from that, Starolfr uses two weapons rather than one, so she has long combos of fast attacks, with several guard breaking attacks included in the set. The rhythm and sequence of his various combos are difficult to grasp, unless you are an expert in parrying, we advise you to dodge them, and only parry the end of his normal combos, or his attacks that you overpower, in order to create an opening to attack.

Kratos doesn't like normal swords, he just uses them for a brief moment in combat in order to get a buff or trigger a special effect, which can turn the tide of battle. Discover a guide with the list of relics of God of War, as well as their power and their position.